Learn how to install and effectively use Claude Code Worker. A comprehensive guide covering terminal setup, authentication, and practical use cases.

The Era of AI Pair Programming
In modern development environments, AI coding assistants have become essential rather than optional. Claude Code Worker is a powerful AI pair programmer developed by Anthropic, supporting everything from code writing to debugging and automation. This guide will walk you through everything from installation to practical usage.
What is Claude Code Worker?
Claude Code Worker is an AI-powered coding assistant that understands your entire project, generates contextually appropriate code, and automates complex development tasks. Beyond simple code completion, it understands project structure like a real developer, executes Git commands, and can modify multiple files simultaneously.
Key Features
- Full Codebase Understanding: Analyzes all files and structure to provide contextual answers
- Direct File Modification: Creates and modifies files with user approval
- Command Execution: Runs terminal commands for building, testing, and Git operations
- Multiple Interfaces: Supports terminal CLI, web application, desktop app, and IDE extensions
Difference from Other AI Tools
Claude Code Worker operates in an agent mode, going beyond simple code suggestions. When you ask "create a login feature," it generates necessary files, writes code, and even runs tests automatically. This is fundamentally different from autocomplete tools like GitHub Copilot or Tabnine.
System Requirements
Before installation, ensure you have:
- Terminal or command prompt access
- Code project to work on
- Claude subscription (Pro, Max, Teams, Enterprise) or Console account
- Node.js 18 or newer (for npm installation method)
Installation Methods
Claude Code Worker offers various installation methods to suit your workflow.

1. Native Install (Recommended)
The recommended installation method with automatic updates.
macOS, Linux, WSL:
curl -fsSL https://claude.ai/install.sh | bash
Windows PowerShell:
irm https://claude.ai/install.ps1 | iex
Windows CMD:
curl -fsSL https://claude.ai/install.cmd -o install.cmd && install.cmd && del install.cmd
Advantages:
- Automatic background updates to the latest version
- Simple and fast installation process
- Consistent experience across all platforms
2. Homebrew (macOS, Linux)
For those who prefer package management on macOS or Linux:
brew install --cask claude-code
Note: Homebrew installations don't auto-update, so you'll need to periodically update with:
brew upgrade claude-code
3. WinGet (Windows)
For Windows users using the official package manager:
winget install Anthropic.ClaudeCode
Update with:
winget upgrade Anthropic.ClaudeCode
4. npm (Node Package Manager)
If you're comfortable with Node.js environments:
npm install -g @anthropic-ai/claude-code
Permission Error Fix: For permission errors, it's safer to change the npm global directory to your home:
mkdir ~/.npm-global
npm config set prefix '~/.npm-global'
export PATH=~/.npm-global/bin:$PATH
IDE Extensions
Beyond terminal, you can use Claude Code Worker directly in these IDEs:
- VS Code: Search for "Claude Code" in the extensions marketplace
- JetBrains IDEs (IntelliJ IDEA, PyCharm, WebStorm): Install from plugins marketplace
Authentication and Initial Setup
After installation, you'll need to authenticate on first run.
First Run
In your project directory, run:
claude
On first run, you'll be directed to a login page. You can authenticate using:
- Claude.ai account login
- Anthropic Console API key
Authentication information is securely stored on your system for automatic login next time.
API Key Setup
If using an API key, enter the key issued from the Console. The key is encrypted and stored locally.
Basic Usage
Starting a Session
Navigate to your project directory:
cd your-project
claude
When Claude Code Worker starts, an interactive session opens. Now you can input requests in plain language.
Basic Commands and Interaction
Example 1: Adding New Features
User: Create a user login feature using JWT for authentication,
      including both the login form and backend API.

Claude: I understand. I'll implement the login feature. I plan to create these files:
       1. components/LoginForm.tsx - Login UI
       2. api/auth.ts - Authentication API endpoint
       3. utils/jwt.ts - JWT token management

       Shall I proceed?
Example 2: Bug Fixing
User: Fix the issue where the user list isn't loading

Claude: After analyzing the code, the useEffect in the users component
       is missing the dependency array. I'll fix it.
File Modification Approval Process
Claude Code Worker always requests permission before modifying files:
- Propose Changes: Claude explains which files will be modified and how
- Review and Approve: Approve each change individually or enable "Accept all" mode
- Execute Modifications: Only approved changes are actually applied
This process gives you complete control while maintaining high productivity.
Practical Usage Example
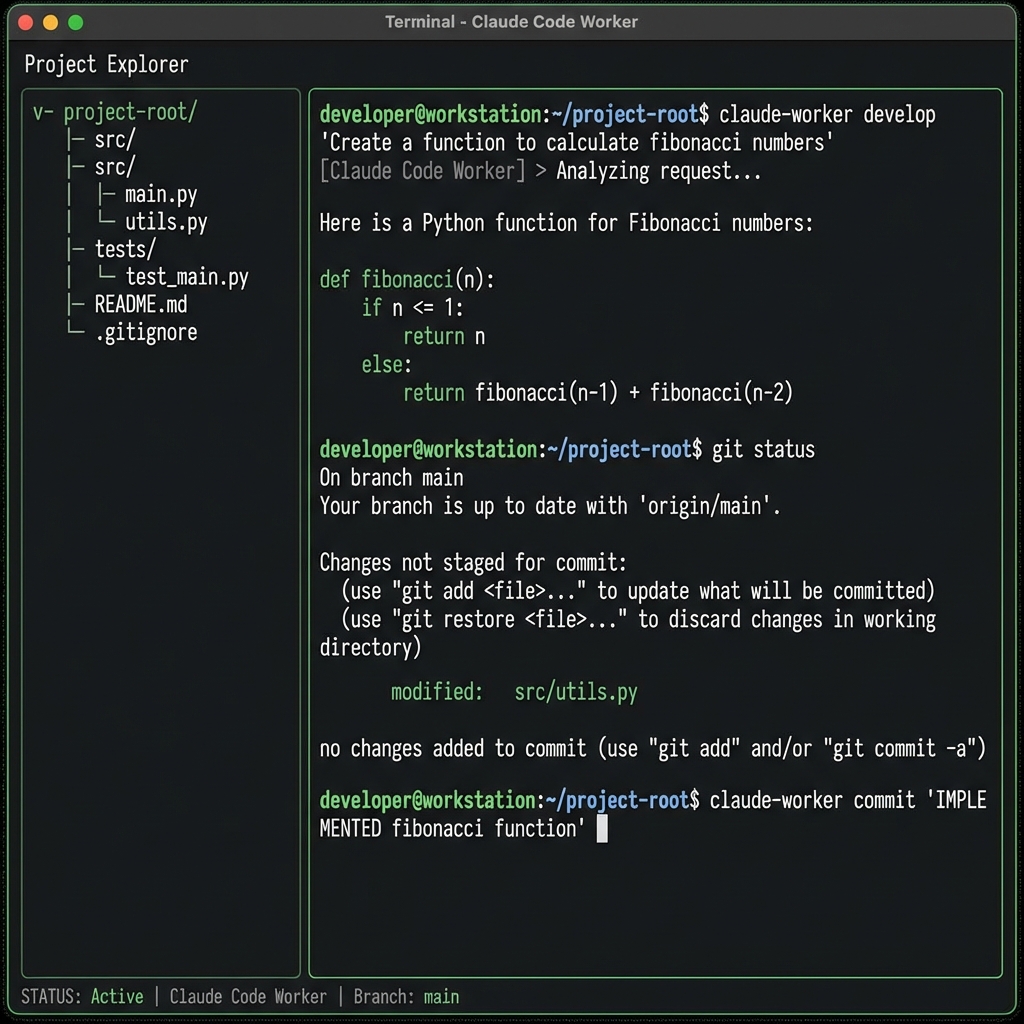
Git Workflow Automation:
User: Commit all changes and push to main branch

Claude: I'll check git status and perform these actions:
       1. git add .
       2. git commit -m "Add user authentication feature"
       3. git push origin main

       Shall I execute?
Key Features and Applications
1. Feature Development
Implement complex features with a single request.
User: Add a real-time chart to the dashboard using Chart.js,
      updating data every 5 seconds.
Claude installs necessary libraries, creates chart components, and implements all data fetching logic.
2. Debugging and Bug Fixes
Copy and paste error messages to automatically analyze and fix issues.
User: I'm getting "TypeError: Cannot read property 'map' of undefined"
      How do I fix this?

Claude: The users array is undefined when calling map.
       I'll add optional chaining to fix it.
3. Codebase Navigation
Understands and explains project structure.
User: How is the authentication system implemented in this project?

Claude: After analyzing the project, here's the structure:
       - auth/middleware.ts: JWT token verification
       - hooks/useAuth.ts: Authentication state management
       - api/login.ts: Login endpoint
       ...
4. Automation Tasks
Automatically handles repetitive and tedious tasks:
- Batch Lint Fixes: "Fix all ESLint errors"
- Type Error Resolution: "Resolve all TypeScript type errors"
- Merge Conflict Resolution: "Resolve merge conflicts"
- Release Notes: "Create release notes from last week's commits"
5. Git Integration
Claude Code Worker fully recognizes Git repositories:
- Branch switching and creation
- Commits and pushes
- Conflict resolution
- History analysis
User: Create and switch to feature/new-ui branch

Claude: I'll execute git checkout -b feature/new-ui.
Advanced Tips
Using CLAUDE.md File
Create a CLAUDE.md file in your project root to provide project context to Claude. This acts as Claude's "constitution."
# Project Overview
This is an e-commerce platform built with Next.js 14.

## Coding Style
- Use TypeScript strict mode
- Style with Tailwind CSS
- Apply ESLint + Prettier

## Key Commands
- npm run dev: Start development server
- npm run build: Production build
- npm test: Run tests

## Architecture
- /app: Next.js App Router
- /components: Reusable components
- /lib: Utility functions
Configuring Hooks
Set up automatic command execution at specific points:
- Before tool execution: Before running tools (e.g., run linter)
- After tool completion: After tool completion (e.g., auto-formatting)
- Before file write: Before saving files
Terminal Shortcuts
- Shift + drag: Add file as reference
- Ctrl + V: Paste images
- Escape: Stop Claude (Ctrl + C exits session)
- Up/Down arrows: Navigate command history
Writing Effective Prompts
-
Be specific:
- ❌ "Create login"
- ✅ "Create a login feature using JWT. Authenticate with email and password, store tokens in httpOnly cookies"
-
Provide context:
- "This project uses React 18 and TypeScript"
- "I want to migrate from Auth0 authentication to Firebase Authentication"
-
Specify constraints:
- "Implement in pure JavaScript without external libraries"
- "Apply memoization for performance"
Real-World Use Cases
Case 1: Legacy Code Refactoring
User: Refactor this component to functional component,
      convert to hooks, and update tests.
Claude analyzes the class component, converts to functional, and automatically updates all related test files.
Case 2: API Integration
User: Integrate Stripe payment API, implementing the entire flow
      from payment page to webhook handling.
Productivity Improvement: Developers report that using Claude Code Worker reduces development time by 30-50% on average. Time spent on repetitive tasks, boilerplate code writing, and debugging is significantly reduced.
Precautions and Best Practices
Code Review is Essential
While Claude Code Worker is very powerful, always review generated code:
- Security vulnerabilities check
- Performance issues review
- Business logic accuracy verification
- Test coverage confirmation
Protecting Sensitive Information
- Manage API keys, passwords as environment variables
- Add
.envfiles to.gitignore - Don't directly input sensitive information to Claude
Incremental Work
Break large tasks into smaller steps:
# ❌ Not good
"Refactor the entire application"

# ✅ Good
1. "First refactor the authentication module"
2. "Now update the user management module"
3. "Finally improve the dashboard components"
Using Version Control
Track with Git what Claude changes so you can revert anytime:
git add .
git commit -m "AI-assisted refactoring"
Conclusion: The Future of Development with AI
Claude Code Worker is more than a tool—it's a development partner. It automates repetitive tasks, quickly resolves complex bugs, and improves code quality. But most important is your creativity and judgment. Claude is the executor, and you are the architect.
Install Claude Code Worker now and start a new development experience with AI. Your productivity will improve remarkably.
Need Help?
If you have questions about Claude Code Worker or development inquiries, feel free to contact:
- Email: kck0920@gmail.com
- GitHub: https://github.com/kck0920
Explore Related Tools
Want to boost your development productivity further? Try Hafuture's various tools:
- Text Tools: Character count, case conversion, encoding/decoding, etc.
- Unit Converter: Quick conversion between various units
- Compound Interest Calculator: Investment return simulation
If you're interested in AI development tools and productivity improvement, check out more blog posts!